Hey Hey,
So this week I have been spending some quality time with the new docker container functionality within vRA. I really like the look of it. but I hate how the new shiny UI components have been jammed into vRA’s dated UI. But gives me hope that one day all of vRA will have a face lift.
I have done a video up going through the container part while also creating a multi tiered wordpress container blueprint. Below I will also give a quick and nasty step through for those who dont want to watch the video 🙂
As part of 7.2 there will be 2 sample blueprints one is called “Docker – PhotonOS” and the other “Docker – CoreOS” these templates just need to be configured with your own images and have been pre-configured with properties to allow them when provisioned to be joined to vRA as Docker Container Hosts, these are shown in the below image.

Lets get started!!
After you have some docker hosts available in the container section (any docker host can be added that is compliant to the docker API’s) configure placement zone think of these as reservations.
1) Navigate to placements and on the far right there will be a target like icon click this.
2) Pane on the right will slide out
3) This is where we create a zone.
4) Once a zone is created we can create placements to go into the zone.

5) Click on the arrow to slide the plane back in
6) Click the add to the top right next to the target looking icon
7) Multiple placements can be assigned to a zone and a host is assigned to a placement zone. all of this is pretty straight forward.
Once we have placements and hosts we are good to go and strat provisioning containers.
8) go to templates and search for the wordpress template (if no private registry is added all the templates seen are coming straight from the docker hub) we could just provision here and stand up a container but I want to make a template click the little arrow next to provision and select “Enter additional info”

9) There are a number of tabs and anyone familiar with docker containers most of them will be familiar. in this case we will leave it all default except the Environment Variables.
10) We will fill in the 4 variables as shown in the image below. leaving host blank.

11) Click on save as template
12) We will now see our wordpress container but we want to add another, click on the add container circle.

13) search for mariadb container.
14) select continue.

15) This will bring up the same container definition info as previous wordpress one.
16) We will leave it all default in this instance except for the Environment Variables as shown below.

17) The click add
18) We should now see out 2 containers. We need to create a network so they can communicate even across hosts.
19) Click the add network icon.
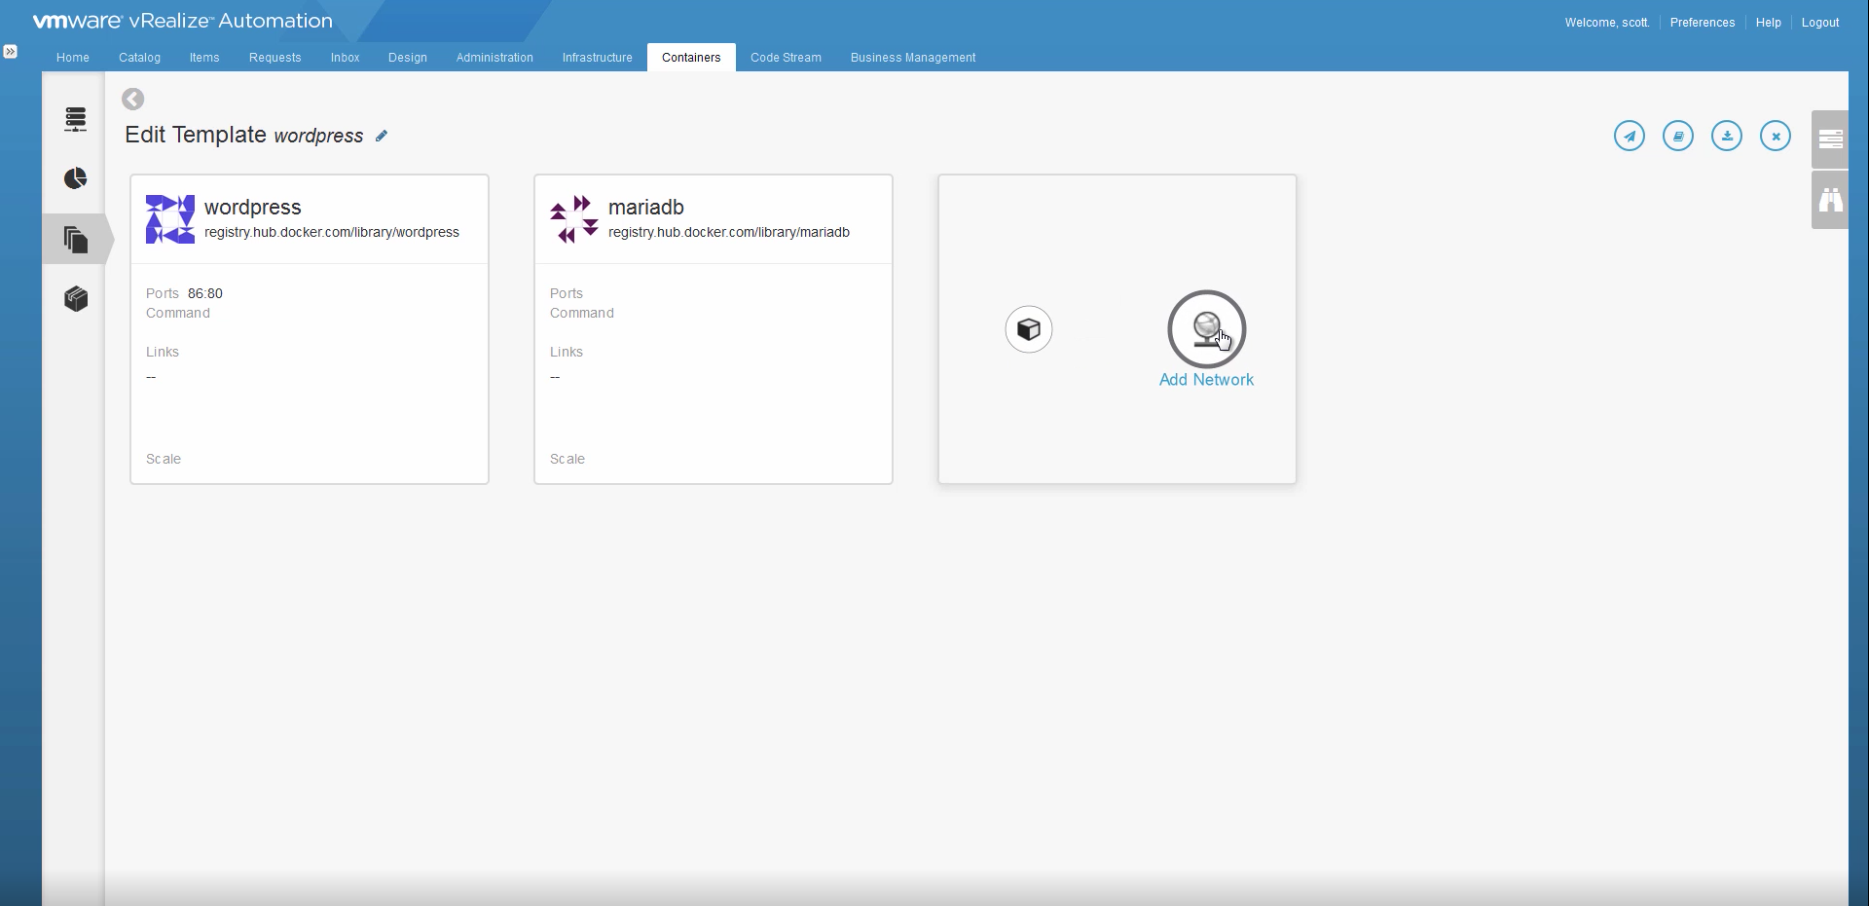
20) Select an existing or create a new. Enter the name.
21) Click save.

We should now see our new or existing network under the containers.
22) The little network connectors at the bottom of the containers. click and drag them to the network, creating a connection. as shown below.

23) If we go into the our containers we can now see network config for them. Click the little pen icon on a container.
24) Navigate to the network tab, Should now see the network connection.

Now we could provision this, in the top right we have 4 icons provision, push, download and delete.
25) We want to push, click this icon. We should get a successful notification as shown below.

What this has done is create a vRA blueprint.
26) Go to the design tab in vRA and we should see that template in draft.

27) Edit this blueprint and we can see the layout of our containers and the network, very similar to how vSphere networks are created in a blueprint.

Now we can change any of the same settings as we could from the container section but what we want to try here is binding a value. the wordpress_db_host value to the name of the mariadb container which we wont know until provisioning making the blueprint a little less static.
28) Select the wordpress container
29) Click on the environment tab and double click the db_host value.
30) check the binding box and bind the value to _resource~mariadb~name
31) Click ok and finish to save the blueprint.

32) publish blueprint and add it to the catalog
33) Request the catalog item.
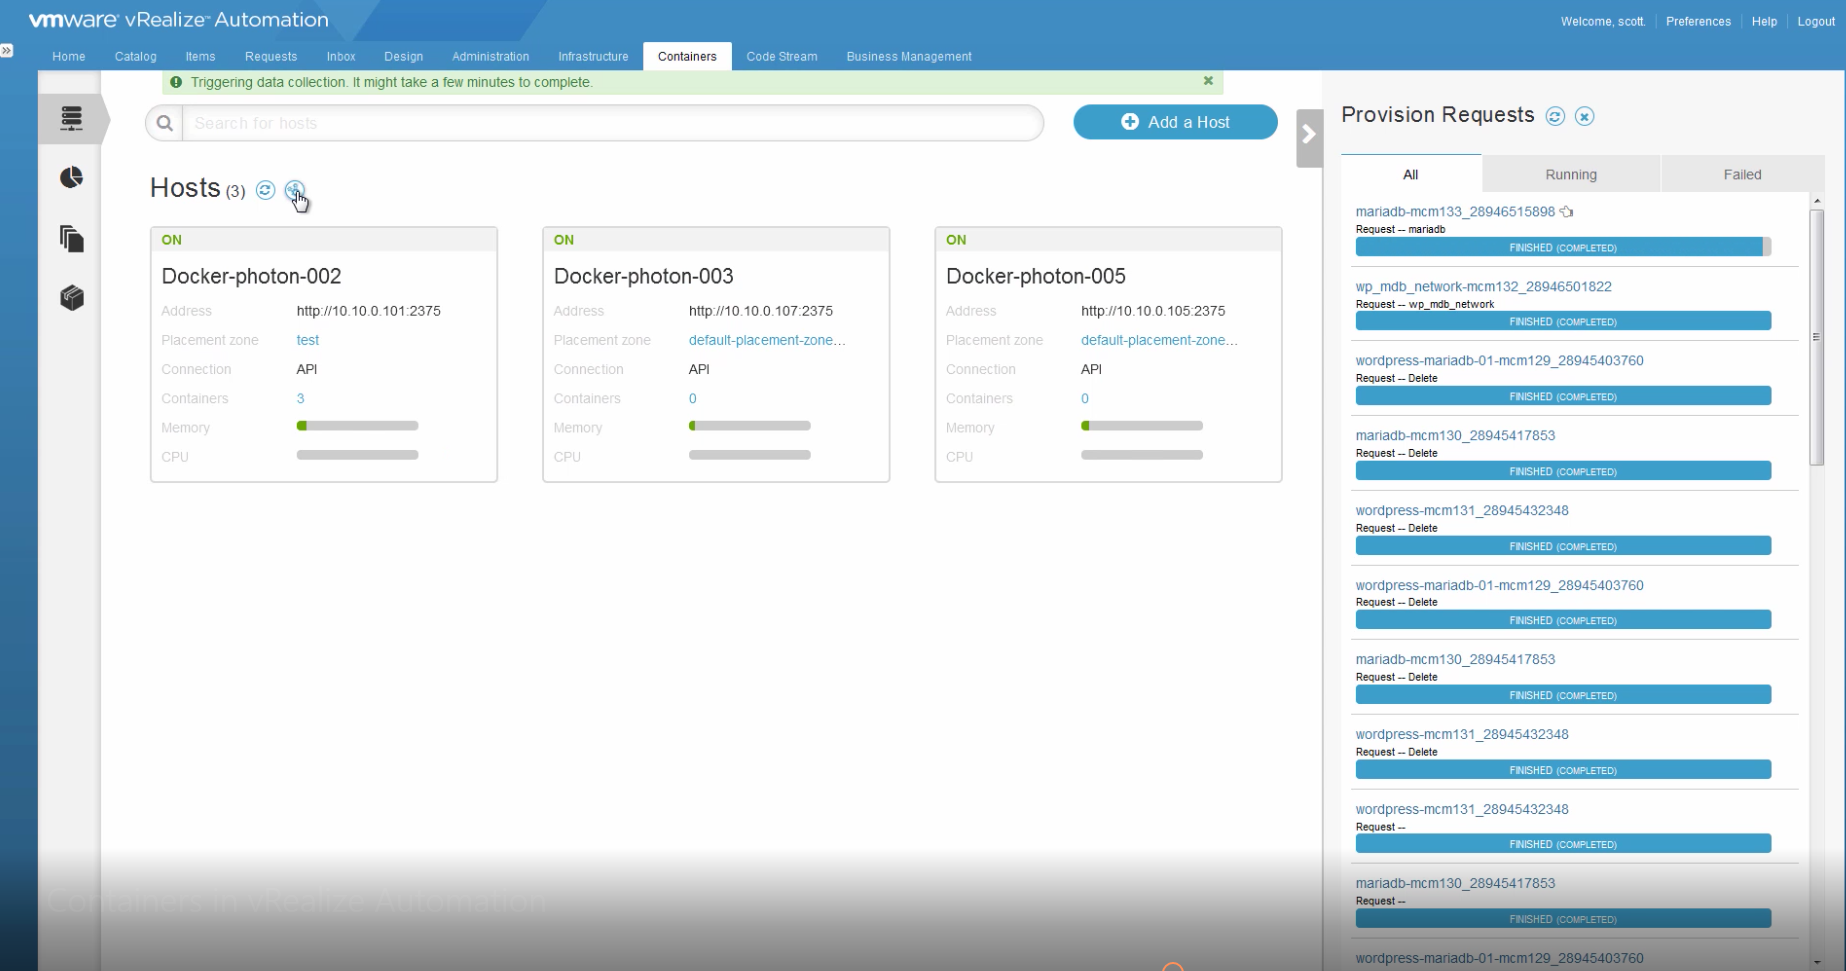
While this is provisioning we can look at the requests being made through the container sections as shown in the below image.
Or we can see though the requests tab in vRA to see the progress just like a normal blueprint.

When its been provisioned we can view the containers through either the container section on containers, or though our items tab in vRA. both show the nice new interface showing the log cpu/mem/net usage as well as general details like below.


If we go to the wordpress container it will have a link in the ports property, if everything worked well we can click this and get the wordpress setup page


Awesome everything worked well.
We can take a look into the container to have a look at the wp-config.php file which shows the name that was entered because of the binding

Thank you for a great post. This worked like a charm.
Hey Rutger that’s awesome!! good to hear, cheers heaps for the feedback.